
October 11, 2026
3 Fake Wall Layouts to Create
Introduction
A studio apartment is one room doing the job of five. Bedroom, living room, dining room, office, and kitchen—all sharing the same four walls. And of all those functions, the kitchen is the one that most stubbornly refuses to blend in.
Cooking smells drift to your pillow. Splatter lands on your sofa. And no matter how neatly you arrange your counters, the visual clutter of a kitchen always makes a studio feel smaller than it is.
The solution isn’t a full renovation. It’s a fake wall—a layout device that creates the feeling of a separate kitchen without the cost, permits, or permanence of actual construction.
In this guide, I’ll walk you through three fake wall layouts that work brilliantly in studio apartments, with real measurements, rental-friendly versions, and honest trade-offs for each.
What Is a “Fake Wall” Kitchen Layout?
A fake wall is any element that visually and physically separates your kitchen zone from the rest of the room without being a full structural wall.
It isn’t a load-bearing partition. It isn’t drywall. It’s a design intervention—sometimes a piece of furniture, sometimes a low wall, sometimes a screen—that tells your brain (and your guests’ brains) “the kitchen ends here.”
Fake walls do three things at once:
- Define the zone — they create a visual boundary between cooking and living
- Contain the mess — they block sightlines to dirty dishes and cluttered counters
- Preserve light and flow — they don’t cut the room in half the way a real wall would
Unlike a full wall, a fake wall keeps the studio feeling open. That’s the entire point.
Why Studio Apartments Need a Defined Kitchen Zone
Before diving into the layouts, let’s be clear about why this matters.
In a studio, undefined space feels smaller than defined space. When your bed, sofa, and kitchen all bleed into one another, the room reads as one cluttered mass. When each zone has a clear edge, the same square footage feels larger and more intentional.
A defined kitchen zone also solves practical problems:
- Cooking smells stay contained (partially—a fake wall won’t stop everything, but it helps)
- Grease and splatter are less likely to reach soft furnishings
- Visual clutter from counters and appliances is screened from the living area
- Guests instinctively know where to stand and where not to
- Resale or rental value improves, because the space reads as a “studio with a defined kitchen” rather than “a room with a stove in it”
This is why the fake wall isn’t just decoration. It’s spatial planning.
Layout 1: The Peninsula Divider
Best for: Studios where the kitchen runs along one wall and you have at least 8 feet of width to work with.
The peninsula divider is a counter-height surface that extends perpendicular from your kitchen wall into the room, acting as both a physical barrier and a functional workspace.
How It Works
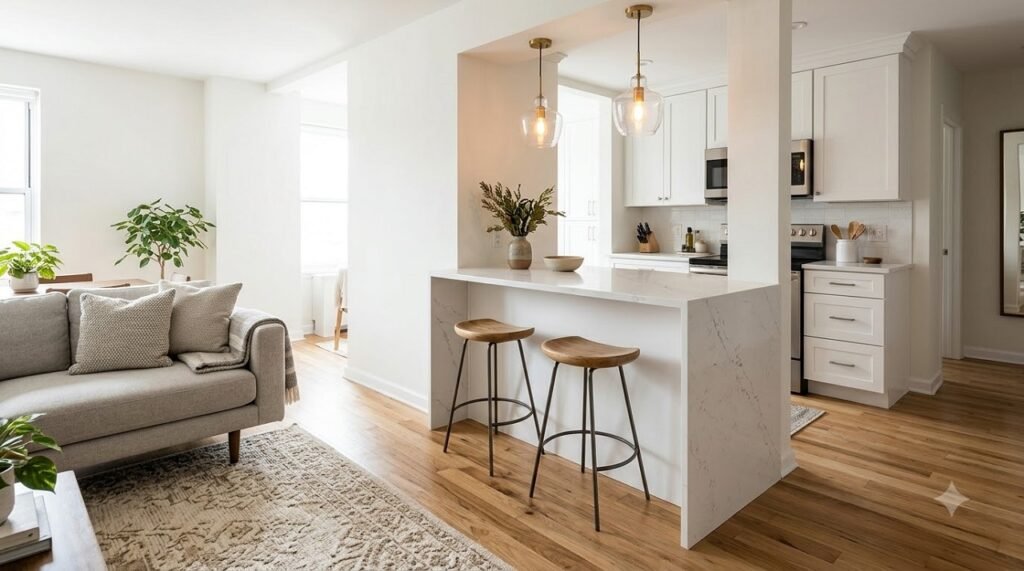
A peninsula is essentially an island attached to one wall. In a studio, it does double duty: it separates the kitchen from the living area, and it provides extra counter space that most studio kitchens desperately lack.
Unlike a full island, a peninsula leaves the room open on three sides, so light and movement flow around it naturally. It’s the least claustrophobic of all fake wall options.
Key Measurements
| Measurement | Specification |
|---|---|
| Peninsula depth | 24–27 inches |
| Seating overhang (if used) | 12 inches minimum |
| Clearance on kitchen side | 36–42 inches |
| Clearance on living side | 36 inches minimum for chair pull-out |
| Standard height | 36 inches (counter height) or 42 inches (bar height) |
| Minimum room width for peninsula | 8 feet (to allow clearance both sides) |
Design Tips
- Choose bar height (42 inches) if you want the divider to screen more of the kitchen. Counter height (36 inches) screens less but feels more open.
- Add seating on the living-room side. This turns the peninsula into a breakfast bar—one of the most useful features in a studio.
- Use the kitchen-facing side for storage. Base cabinets or open shelving underneath make the peninsula earn its footprint—Houzz has a strong gallery of peninsula storage ideas if you need inspiration for what to put there..
- Match the countertop to your kitchen counters. A continuous material makes the peninsula feel intentional rather than added-on—the same principle used in the single-wall galley configurations in our galley kitchen guide..
Pros and Cons
Pros:
- Adds valuable counter and storage space
- Creates a clear, functional boundary
- Provides a dining surface without a separate table
- Feels open and airy
Cons:
- Requires at least 8 feet of room width
- Reduces flexibility in furniture arrangement
- Not renter-friendly unless you use a freestanding version
📐 Working With a Narrow Studio Kitchen?
Our guide to the 10 best galley kitchen layouts covers single-wall and slim galley configurations in detail, with real measurements for every option.
View 10 Galley Kitchen Layouts →Layout 2: The Half-Wall (Pony Wall)
Best for: Studios where you want a more architectural, permanent-looking divide without closing off the space.
A half-wall (also called a pony wall) is a low partition—typically 36 to 48 inches high—that sits between the kitchen and the living area. It’s topped with a counter, a wood cap, or open shelving, and it creates a much stronger visual boundary than a peninsula alone.
How It Works
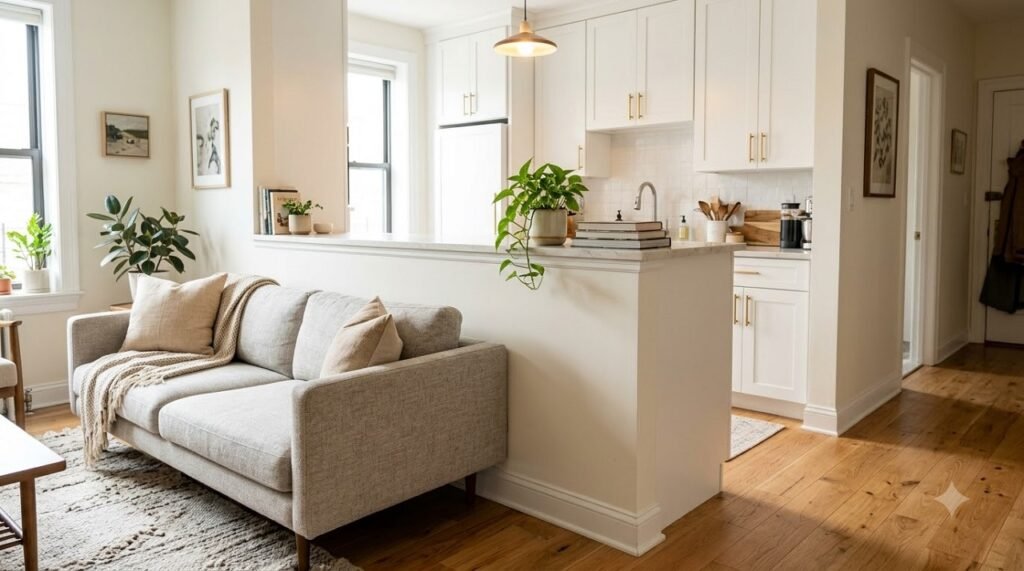
The half-wall is a partial construction. It’s usually built as a framed stud wall covered in drywall, or as a simple masonry block wall. Because it doesn’t reach the ceiling, it preserves the open feel while creating a distinct “room within a room.”
In a studio, the half-wall often runs parallel to the kitchen counter, creating a galley-style cooking corridor with a clear entry point at one or both ends.
Key Measurements
| Measurement | Specification |
|---|---|
| Half-wall height | 36–48 inches |
| Half-wall thickness | 4–6 inches |
| Clearance between half-wall and counter | 36–42 inches minimum |
| Minimum room width | 9–10 feet for comfortable flow |
| Cap depth | 8–12 inches if used as a shelf |
Design Tips
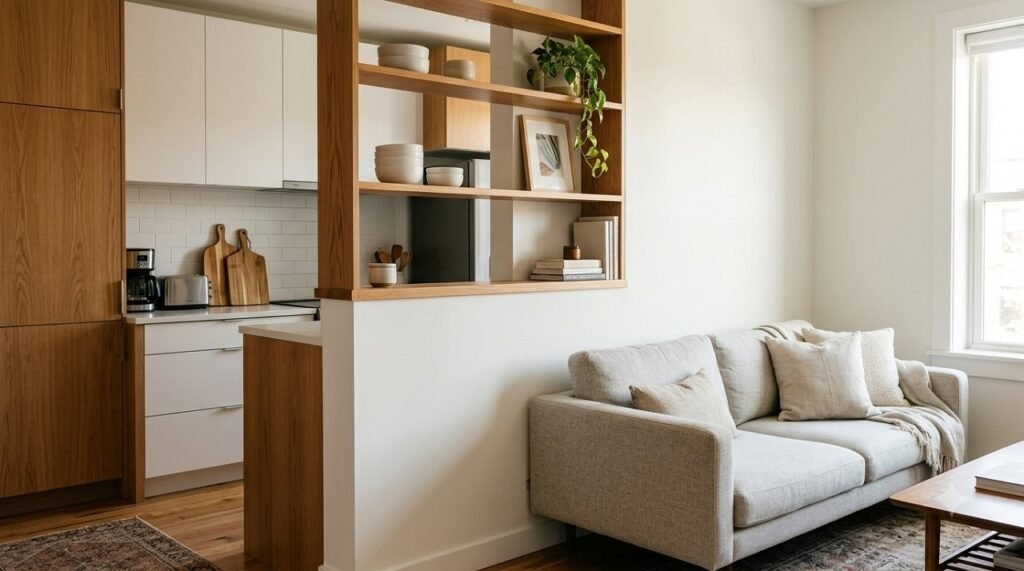
- Cap the half-wall with the same material as your counters. It ties the two zones together and gives you a usable surface.
- Use the cap as a display ledge. A narrow shelf on top of the half-wall is perfect for plants, books, or a small lamp.
- Consider a change in flooring at the half-wall. A transition strip from tile to wood reinforces the boundary without construction.
- Add an outlet on the living-room side. It’s a small detail that makes the half-wall genuinely useful, not just decorative.
- Keep the height at 42 inches if you want to screen counter clutter. Anything lower and you’ll still see the mess from the sofa.
Pros and Cons
Pros:
- Strong, architectural boundary
- Creates a genuine “room within a room”
- Can be topped with a usable counter or shelf
- More permanent-looking than a peninsula
Cons:
- Requires construction (not rental-friendly)
- Needs more floor space than a peninsula
- Can feel heavy in very small studios
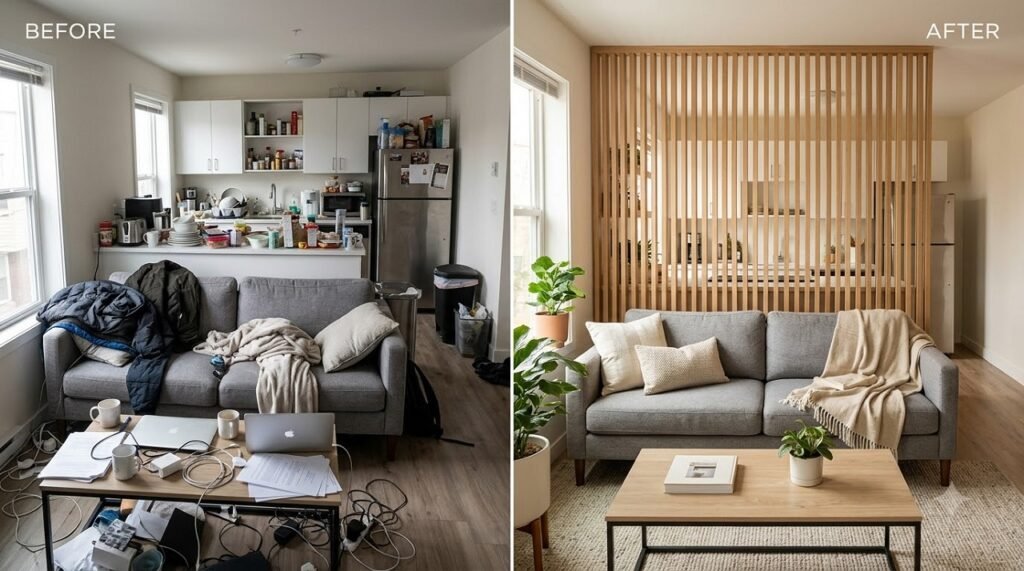
Layout 3: The Slatted Screen Partition
Best for: Renters, small studios, and anyone who wants maximum light flow with a clear visual boundary.
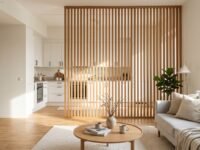
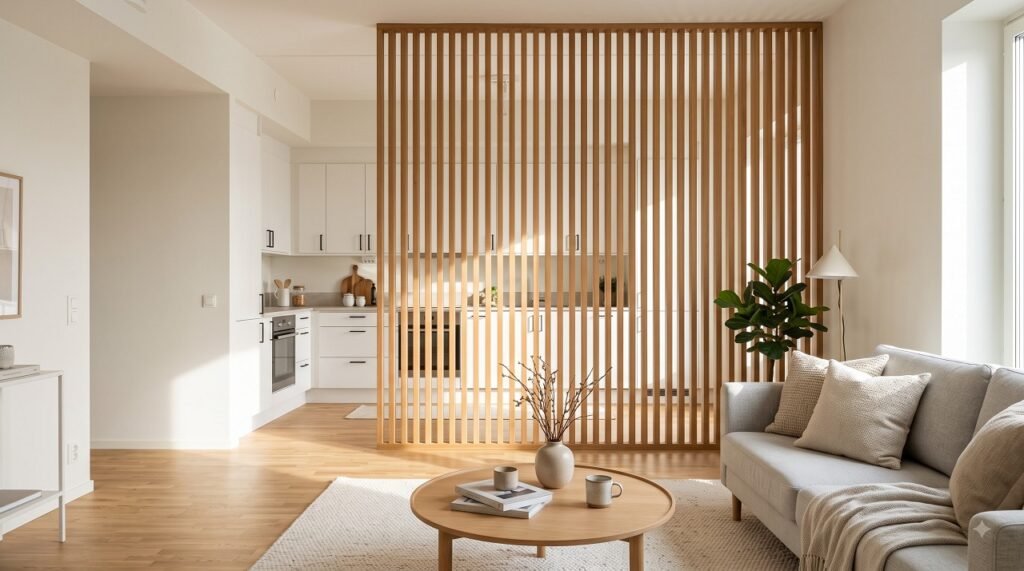
A slatted screen partition is a series of vertical wood slats, metal rods, or glass panels that create a semi-transparent wall between your kitchen and living area. Light passes through. Air passes through. But your eye reads it as a boundary.
This is the most popular fake wall solution for studio apartments in 2026, because it balances separation with openness better than almost anything else.
How It Works
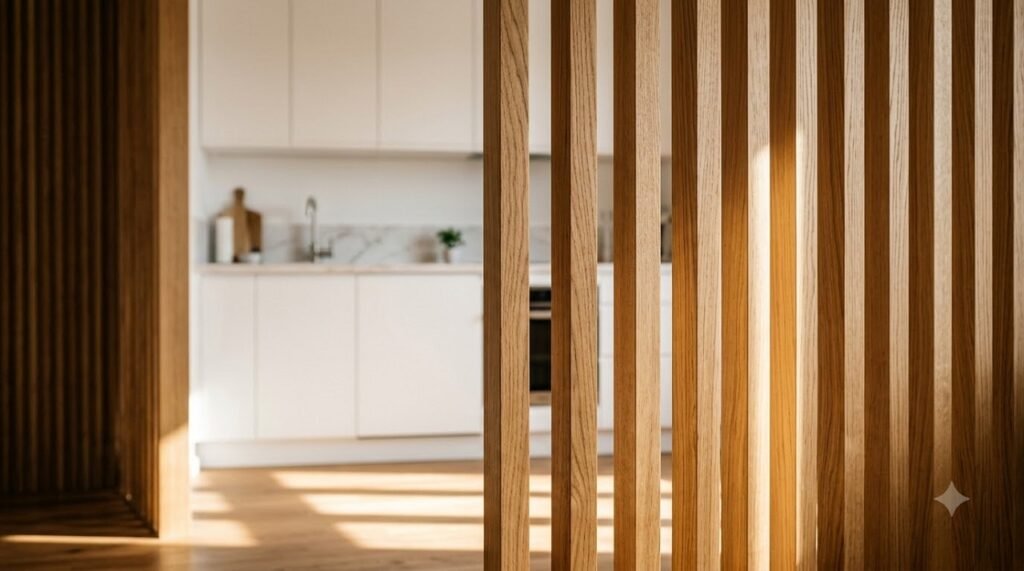
Slatted partitions can be:
- Floor-to-ceiling fixed screens (most architectural)
- Partial-height screens (waist to shoulder height)
- Freestanding folding screens (fully rental-friendly)
- Sliding panels that retract when you want the space open
The slats are typically spaced 2 to 4 inches apart, which blocks sightlines to clutter while allowing light and air to move freely.
Key Measurements
| Measurement | Specification |
|---|---|
| Slat width | 1–2 inches |
| Slat spacing | 2–4 inches |
| Screen height | 60–96 inches (or ceiling height) |
| Screen width | Custom—typically spans the kitchen opening |
| Minimum clearance | 36 inches on both sides |
Design Tips
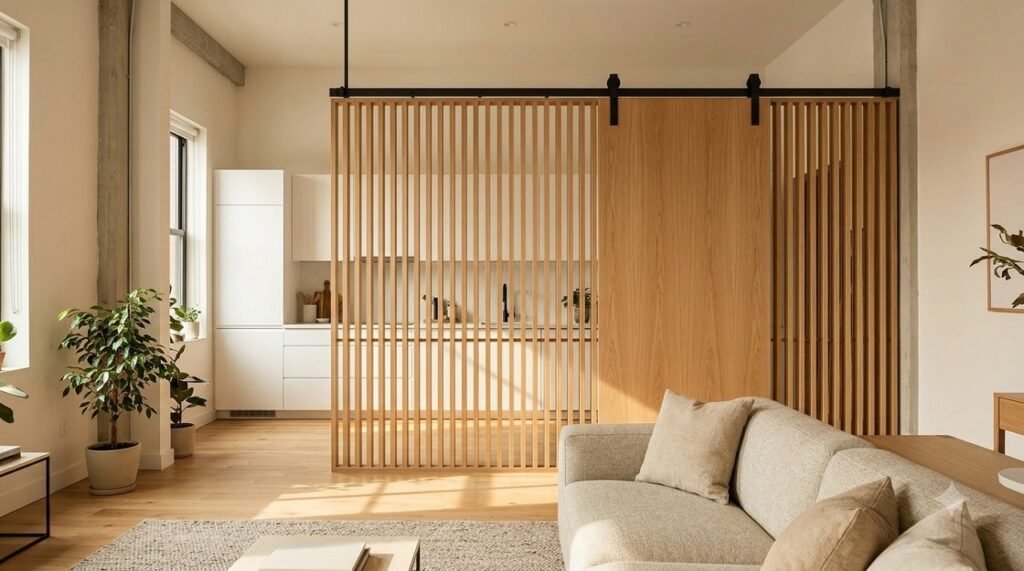
- Match the slat material to your kitchen cabinets or floor. Oak slats with oak cabinets, walnut slats with walnut accents—this creates visual cohesion. If your kitchen storage will be visible through the screen, our open shelving vs upper cabinets comparison explains which option works best in a visible zone.
- Use a warm wood tone. Pale or white slats can look sterile; medium wood tones add warmth to a small studio.
- Go floor-to-ceiling if you can. It reads as more architectural and screens more effectively.
- Add a sliding door panel. A single sliding panel on a track lets you close the kitchen off completely when cooking something pungent.
- Combine with a change in flooring. A tile-to-wood transition at the screen line reinforces the boundary.
Pros and Cons
Pros:
- Maintains light and airflow
- Rental-friendly versions available
- Can be installed in a weekend
- Visually striking and modern
Cons:
- Screens less clutter than a solid wall
- Slats collect dust and grease over time (especially near the stove)
- Requires careful material choice to avoid looking cheap
🔍 Open Shelves or Cabinets on the Kitchen Side?
We broke down the honest pros, cons, and maintenance reality of both options—plus the hybrid approach most designers recommend for small, open-plan kitchens.
Compare Open Shelving vs Cabinets →Side-by-Side Comparison: Which Fake Wall Works Best?
| Factor | Peninsula Divider | Half-Wall (Pony Wall) | Slatted Screen |
|---|---|---|---|
| Best for | Adding counter + seating | Strong architectural divide | Renters, light flow |
| Construction needed | Minimal to moderate | Yes (framing + drywall) | Minimal |
| Rental-friendly | Freestanding version only | No | Yes (freestanding version) |
| Light flow | High | Moderate | Very high |
| Clutter screening | Moderate | High | Moderate |
| Cost | $200–$2,000 | $800–$3,000 | $150–$1,500 |
| Floor space needed | 8 ft width minimum | 9–10 ft width minimum | 7 ft width minimum |
| Permanence | Semi-permanent | Permanent | Semi-permanent to temporary |
Essential Measurements for All Three Layouts
| Measurement | Minimum | Ideal |
|---|---|---|
| Aisle clearance (kitchen side) | 36 inches | 42 inches |
| Clearance (living side) | 36 inches | 42 inches |
| Peninsula depth | 24 inches | 27 inches |
| Seating overhang | 12 inches | 15 inches |
| Half-wall height | 36 inches | 42 inches |
| Slat spacing | 2 inches | 3 inches |
| Kitchen zone width (minimum) | 5 feet | 7 feet |
Rule of thumb: whatever fake wall you choose, keep at least 36 inches of walkway on both sides. Below that, the divider becomes an obstacle rather than a feature—these clearances follow the same aisle and clearance standards published by the NKBA for all kitchen layouts..
Rental-Friendly Versions (No Drilling, No Damage)
“If you rent, you can still create a fake wall. Apartment Therapy regularly covers renter-safe divider solutions if you want more ideas beyond what’s here. Here are the no-damage options:
For a Peninsula Effect
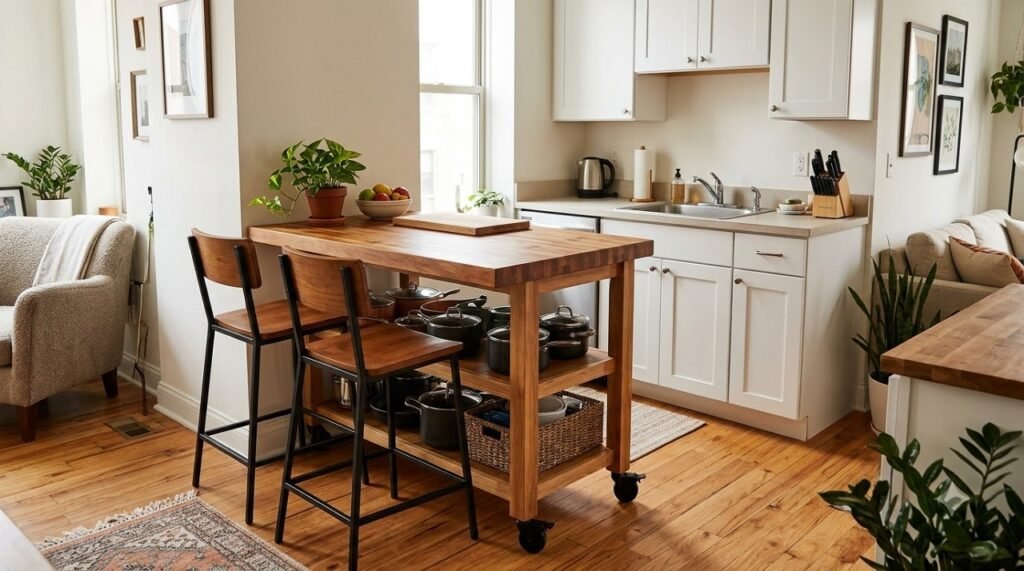
- A rolling kitchen cart with a butcher-block top, positioned perpendicular to your kitchen wall
- A narrow console table with a bar stool on the living-room side
For a Half-Wall Effect
- A low bookcase (36–42 inches high) placed between zones, topped with a wood plank
- A pair of matching cube storage units pushed together to form a low wall
For a Slatted Screen Effect
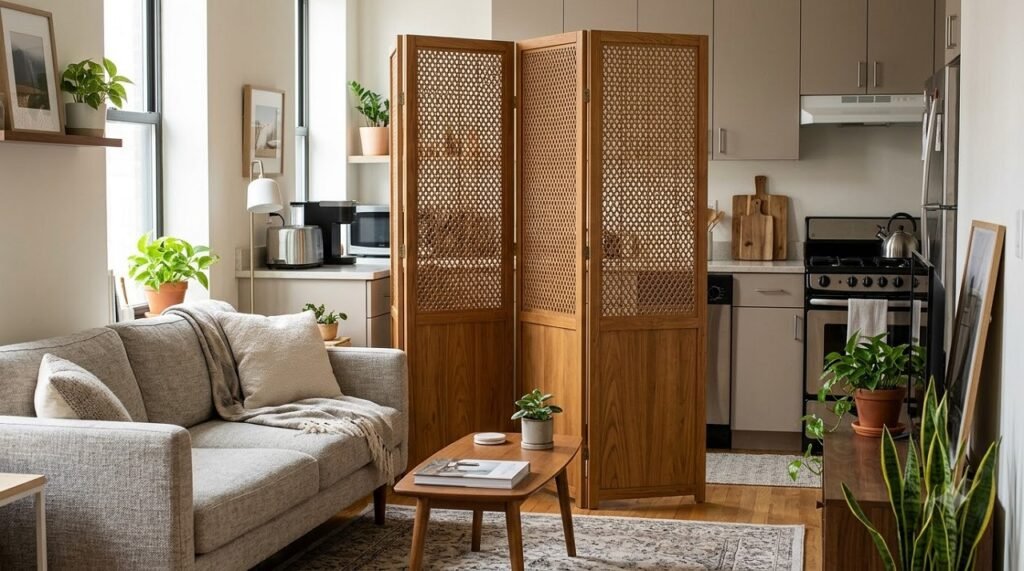
- A freestanding folding screen in wood or rattan (IKEA, Wayfair, and Amazon all stock these)
- Tension-rod vertical slat panels that wedge between floor and ceiling without screws
- A curtain on a ceiling track (some tracks are adhesive-mounted and renter-safe)
These solutions won’t have the permanence of a built version, but they deliver 80% of the visual benefit at 10% of the cost and zero risk to your deposit.
Lighting & Flooring: How to Reinforce the Divide
A fake wall works best when lighting and flooring support it.
Lighting
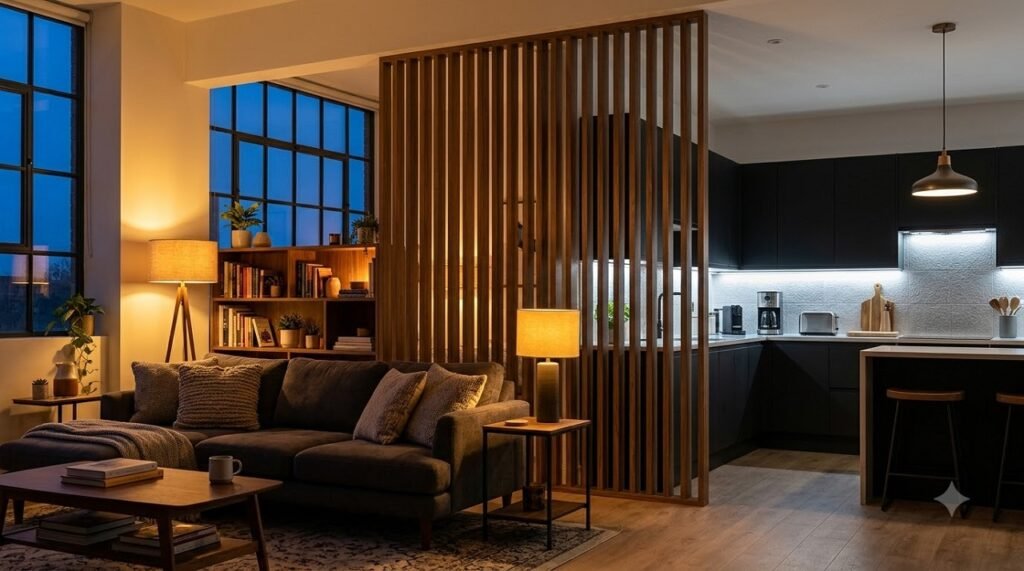
- Use two different lighting temperatures. Warmer light (2700K) in the living area, cooler task lighting (3000–4000K) in the kitchen. The eye reads the shift as a boundary.
- Add a pendant over the peninsula or half-wall. It draws the eye to the divider and reinforces it as a threshold.
- Use under-cabinet lighting on the kitchen side to keep the cooking zone bright and the living zone softer.
Flooring
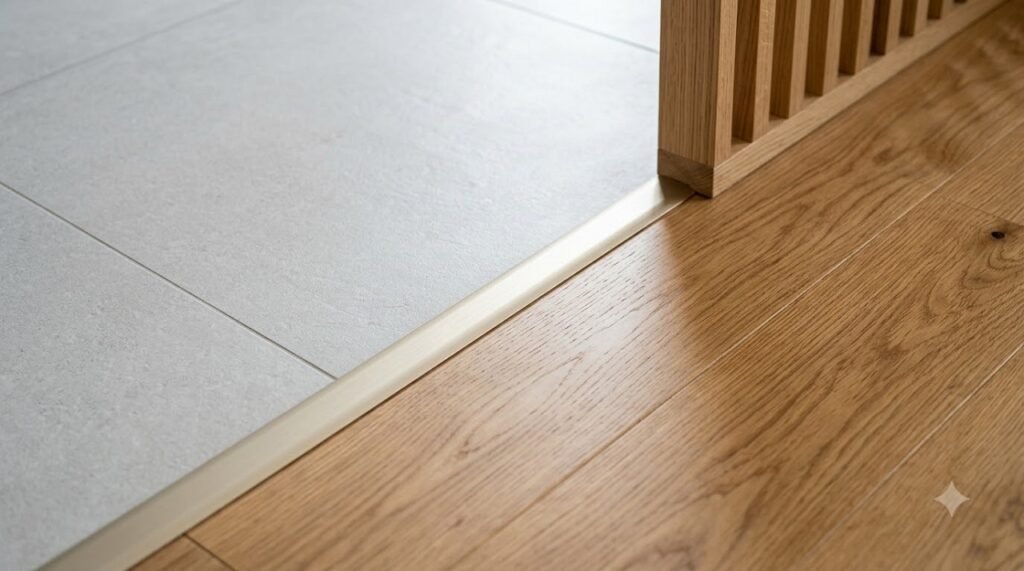
- Change materials at the fake wall line. Tile in the kitchen, wood or carpet in the living area. Even a subtle shift in tone works.
- Use a transition strip if you can’t change the floor. A metal or wood strip at the boundary line reinforces the zone change.
- Choose the same flooring throughout if the studio is very small. In a 400-square-foot studio, continuous flooring often feels better than a hard transition.
7 Common Mistakes to Avoid
- Building the fake wall too tall. A full-height solid wall defeats the purpose of a studio. Keep half-walls under 48 inches and screens as light as possible.
- Skipping the clearance check. Measure twice—36 inches minimum on both sides, or the divider becomes a nuisance.
- Choosing dark materials. Dark wood or black metal partitions absorb light and make a small studio feel smaller.
- Ignoring the stove position. A slatted screen right beside the stove will collect grease. Place screens away from high-splatter zones.
- Forgetting the kitchen side. A fake wall should improve the kitchen too—add storage or counter space on the kitchen-facing side so it earns its footprint.
- Overlooking lighting. A fake wall without dedicated lighting just looks like an obstacle. Add a pendant or a strip light to make it feel intentional.
- Making it permanent when you rent. Always check your lease before drilling. Freestanding options work nearly as well.
Frequently Asked Questions
Can I create a separate kitchen in a studio apartment without construction?
Yes. Freestanding solutions like rolling carts, low bookcases, folding screens, and tension-rod slat panels create a visual kitchen boundary without any drilling or permanent changes. They won’t screen clutter as thoroughly as a built half-wall, but they deliver most of the benefit for renters.
What is the cheapest way to separate a kitchen in a studio?
A freestanding folding screen or a rolling kitchen cart is the cheapest option, typically $100–$300. A tension-rod slatted partition costs $150–$400 and looks more architectural.
How tall should a half-wall be to hide kitchen counters?
A half-wall needs to be at least 42 inches high to screen standard 36-inch counters from a seated position on the sofa. At 36 inches, you’ll still see the countertop and anything on it.
Do slatted partitions block cooking smells?
Partially. Slatted screens block some airflow but not all—they’re not a substitute for a proper extractor fan. If cooking smells are your main concern, combine a slatted screen with a strong recirculating extractor hood.
Will a fake wall make my studio feel smaller?
No—if it’s done right. A well-placed fake wall defines zones, which makes a studio feel more organized and often larger. The mistake is building a solid, floor-to-ceiling wall, which cuts the room in half.
What’s the best fake wall for a very small studio (under 400 sq ft)?
The slatted screen partition is usually the best choice for very small studios because it maintains light flow and takes up almost no floor space. A freestanding version avoids any construction.
Conclusion
Creating a separate kitchen in a studio apartment doesn’t require a contractor, a permit, or a full renovation. It requires one well-placed fake wall that defines the cooking zone without closing off the room.
Here’s the summary:
- Peninsula divider — best if you want extra counter space and seating, and you have at least 8 feet of width.
- Half-wall (pony wall) — best if you want a strong architectural divide and you’re willing to build something semi-permanent.
- Slatted screen partition — best for renters, very small studios, and anyone who wants maximum light flow.
Whichever you choose, remember the three rules: keep it under 48 inches if solid, maintain 36 inches of clearance on both sides, and light it deliberately. Do those three things, and your studio kitchen will finally feel like a room of its own.