



October 21, 2026
7 Paint Colors that Visually Double
Introduction
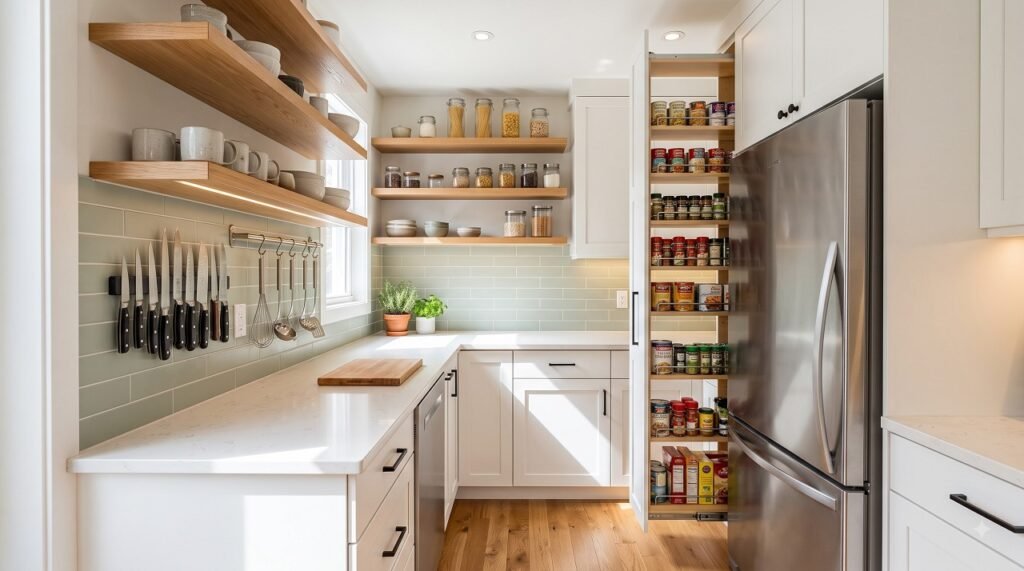
If you have a small kitchen, your countertops are probably the most contested real estate in your home. The kettle lives there. The toaster lives there. The fruit bowl, the knife block, the coffee maker, the jar of olive oil, the stack of bills you meant to file—all of it lives there.
And every single item on that counter is stealing space you need for actual cooking.
The fix isn’t a bigger kitchen. It’s a smarter use of the space you already have—vertically.
In this guide, I’ll give you 20 proven vertical storage ideas that free up countertops in small kitchens. Each one is practical, tested, and arranged by category so you can pick the ones that fit your space, your budget, and your style.
No fluff. No unrealistic Pinterest fantasies. Just 20 ideas that work.
Why Vertical Storage Is the #1 Fix for Small Kitchens
Here’s the math that changes everything: in a typical small kitchen, you have roughly 4 square feet of usable counter space. That’s it. Four square feet for chopping, plating, prepping, and resting hot pans.
But that same kitchen has 30 to 50 square feet of unused vertical wall space—above the counter, behind the door, under the upper cabinets, on the sides of tall units.
Vertical storage isn’t a trend. It’s the only way to reclaim your counter for what it’s actually for: cooking.
Professional kitchens have known this for decades. Restaurant kitchens don’t store knives on the counter—they mount them on magnetic strips. They don’t stack pots on the floor—they hang them from rails. If it works for a chef working in a 6-foot space, it works for you.
How to Measure Your Vertical Space (Before You Buy Anything)
Before you buy a single hook, measure these five zones. Write the numbers down. They’ll save you from buying organizers that don’t fit.
| Zone | What to Measure | Why It Matters |
|---|---|---|
| Wall above counter | Height from counter to upper cabinet (standard 18″) | Determines rail and shelf placement |
| Backsplash width | Total length of clear wall between counter and uppers | Determines how many rails or strips fit |
| Inside cabinet doors | Width × height of each door panel | Determines door rack size |
| Above upper cabinets | Gap between top of cabinets and ceiling | Determines what fits up there (usually 12–24″) |
| Under-cabinet gap | Height from counter to bottom of upper cabinet | Determines if appliances fit underneath |
Once you have these numbers, the 20 ideas below become easy to filter. Each one lists a minimum space requirement, so you’ll know instantly whether it fits.
Wall-Mounted Storage (Ideas 1–5)
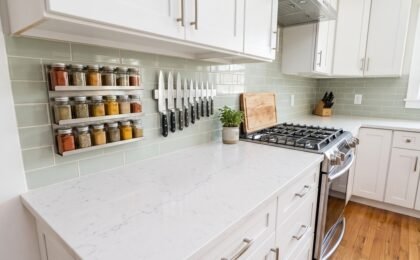
Idea 1: Magnetic Knife Strip
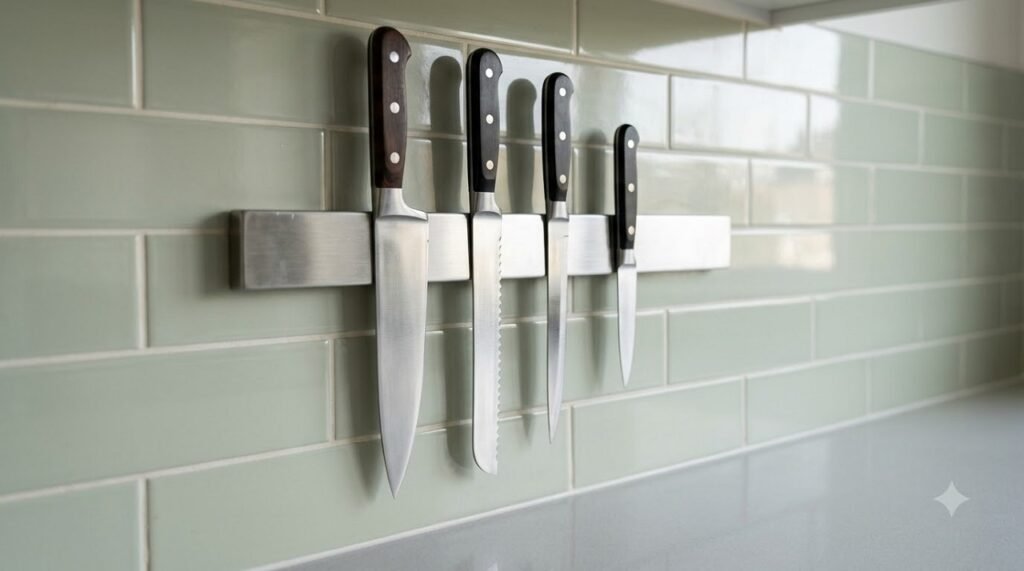
What it is: A metal strip mounted on the wall that holds knives magnetically.
Minimum space: 12–24 inches of wall width, mounted 18 inches above counter.
Why it works: Frees up the entire knife block footprint (typically 4×6 inches of counter) and keeps knives within easy reach of the prep zone. Modern stainless strips look clean and industrial.
Cost: $15–$60
Pro tip: Mount it at least 18 inches above the counter so blade tips stay safely out of reach of children—a guideline consistent with the clearance standards set by the NKBA. Avoid mounting directly behind a sink.
Idea 2: Wall-Mounted Rail with Hooks
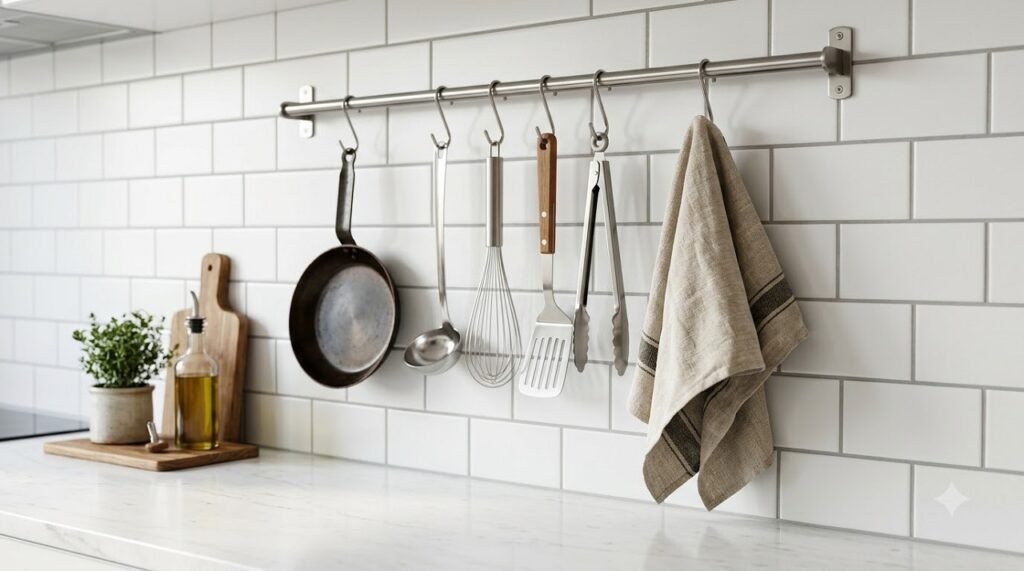
What it is: A horizontal rail with S-hooks for hanging utensils, pans, mugs, and towels.
Minimum space: 24 inches of wall width.
Why it works: Replaces the utensil crock, the mug tree, and the towel bar all at once. Everything hangs, dries, and stays visible.
Cost: $20–$80
Pro tip: Use a rail with adjustable S-hooks so you can rearrange as your needs change. Mount above the counter, not behind the stove.
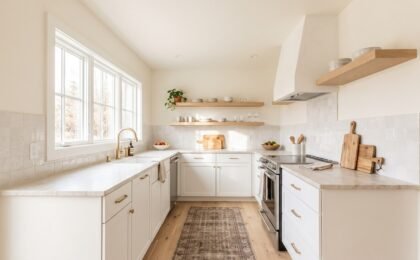
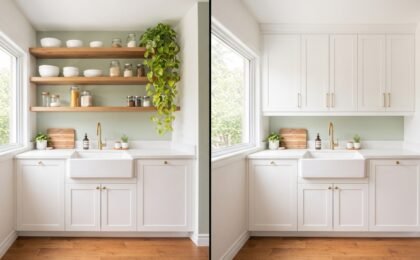
Idea 3: Floating Wall Shelves
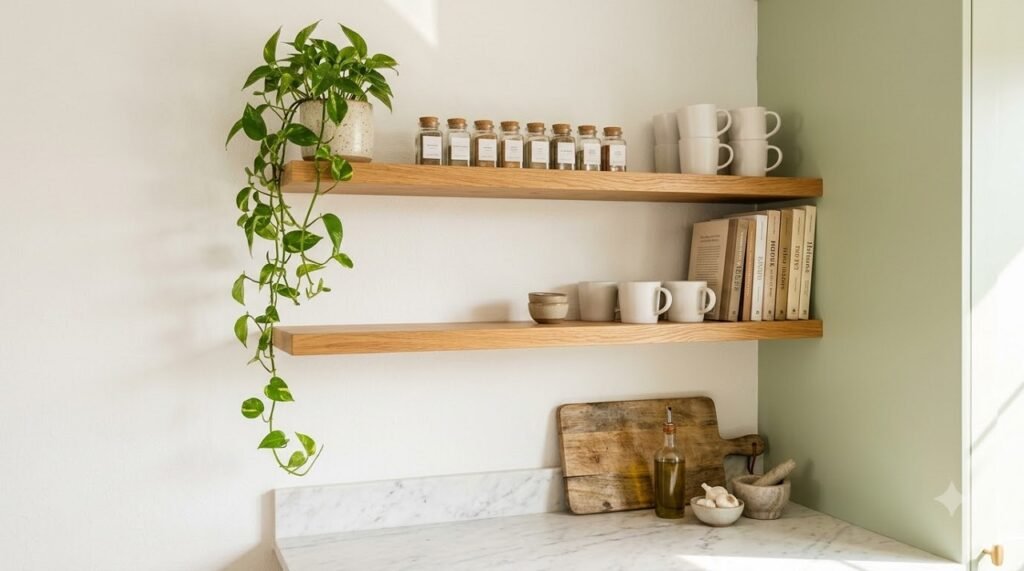
What it is: A single shallow shelf (8–10 inches deep) mounted above the counter.
Minimum space: 24–36 inches of wall width.
Why it works: Adds display and storage without the visual weight of an upper cabinet. Perfect for daily-use items: mugs, spices, small bowls.
Cost: $25–$100 per shelf
Pro tip: Keep shelves under 10 inches deep. Anything deeper blocks sightlines and makes a small kitchen feel heavy. For a full breakdown of open shelves versus cabinets, see our honest comparison of open shelving vs. upper cabinets in a small kitchen.
Idea 4: Magnetic Spice Rack
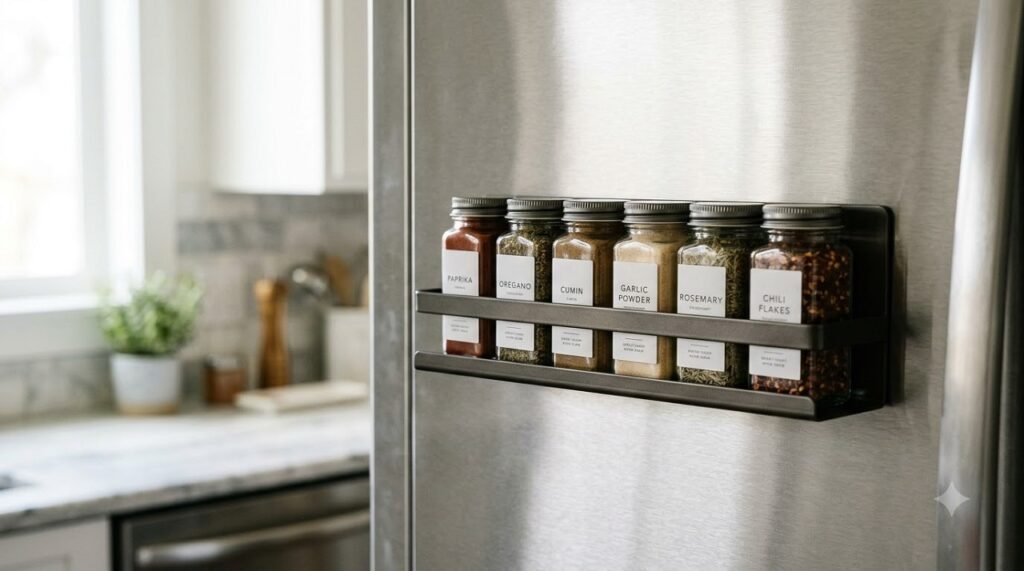
What it is: A magnetic board or strip mounted on the wall or refrigerator for spice jars.
Minimum space: 12 inches of wall width or fridge side.
Why it works: Frees up a cabinet shelf and keeps spices visible while cooking. Small but powerful.
Cost: $15–$40
Pro tip: Use matching jars so it looks intentional rather than cluttered. Label lids so you can find what you need without pulling each jar down.
Idea 5: Pegboard Wall Panel
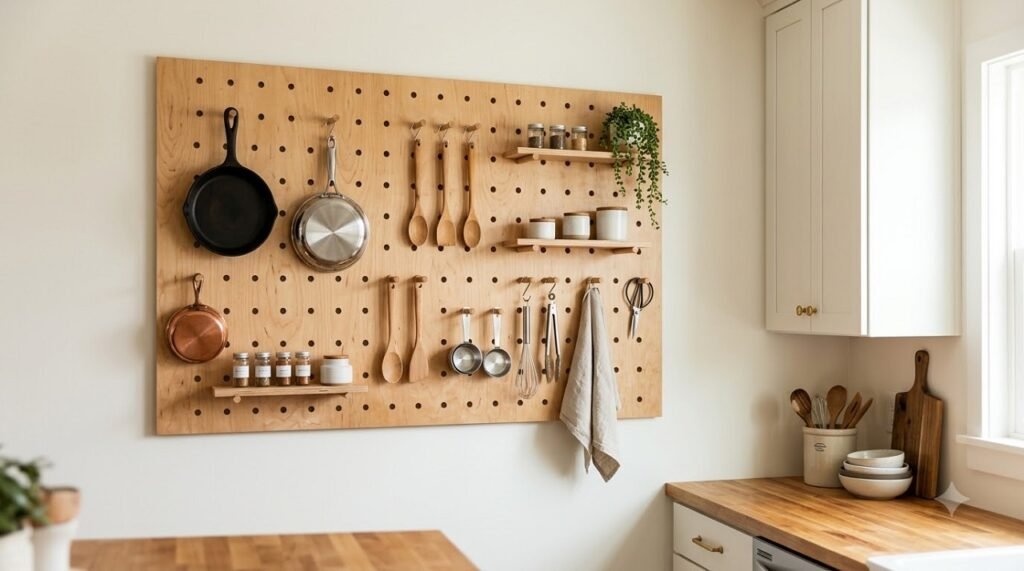
What it is: A perforated board mounted on the wall with pegs and hooks for tools, pans, and small containers.
Minimum space: 24×36 inches of clear wall.
Why it works: Fully customizable. You can reconfigure the entire layout in minutes. Used in professional kitchens for decades.
Cost: $30–$120 including hooks
Pro tip: Mount it on a wall away from the stove so grease doesn’t coat everything.
🔍 Open Shelves or Upper Cabinets?
If you’re replacing upper cabinets with open shelves, we broke down the honest pros, cons, and maintenance reality of both options—plus the hybrid approach most designers recommend.
Compare Open Shelving vs Cabinets →Tall Cabinets & Pull-Outs (Ideas 6–10)
Idea 6: Floor-to-Ceiling Tall Cabinet
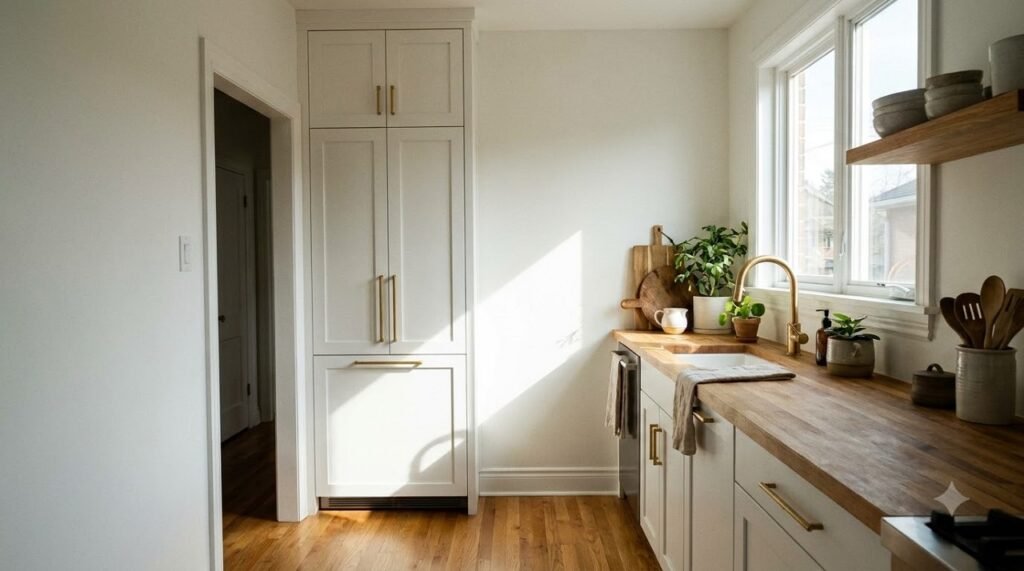
What it is: A single tall cabinet (usually 24 inches wide) that runs from floor to ceiling.
Minimum space: 24 inches of floor width × 24 inches of depth.
Why it works: Holds as much as two standard base cabinets and three upper cabinets combined. In a small kitchen, one tall unit often replaces three separate storage pieces.
Cost: $400–$1,500 (installed)
Pro tip: Make it a pull-out pantry and you’ll increase usable storage by up to 20% over standard shelves.
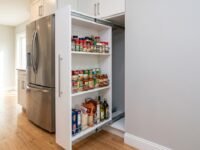
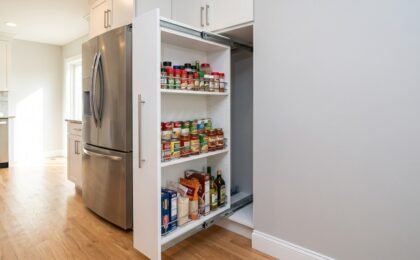
Idea 7: Pull-Out Pantry (12-Inch Width)
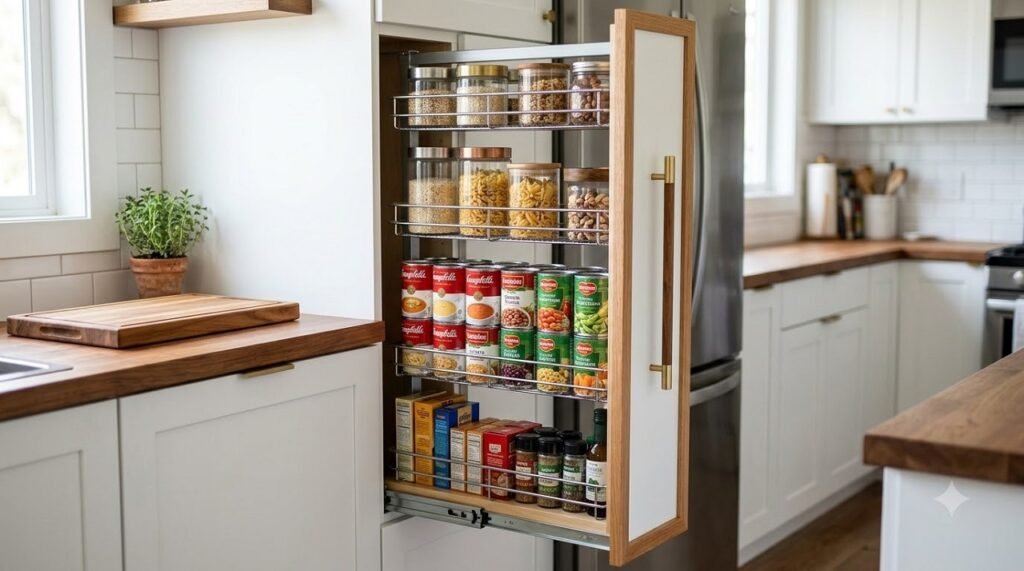
What it is: A narrow tall cabinet with pull-out drawers or baskets that slide out on rails.
Minimum space: 12–15 inches of floor width.
Why it works: Fits in gaps that would otherwise be wasted. Holds jars, cans, dry goods, and spices in a footprint smaller than a chair.
Cost: $150–$600
Pro tip: Use it for deep pantry items that get lost in standard cabinets—the pull-out brings everything to you.
Idea 8: Vertical Baking Sheet & Tray Divider
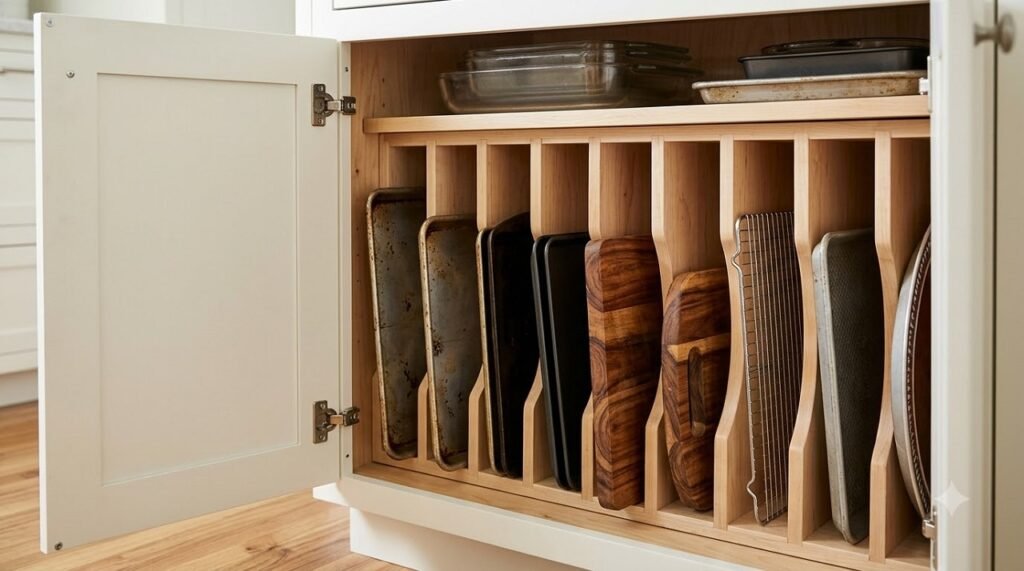
What it is: A slim, vertical divider that stores baking sheets, cutting boards, and trays on their edges.
Minimum space: 9 inches of cabinet height.
Why it works: Frees up an entire cabinet shelf. Stacked flat trays take up 6+ inches of height; stored vertically, they take up 3.
Cost: $15–$50
Pro tip: Install it above the fridge or in a narrow cabinet where flat storage is wasted.
Idea 9: Vertical Plate Rack
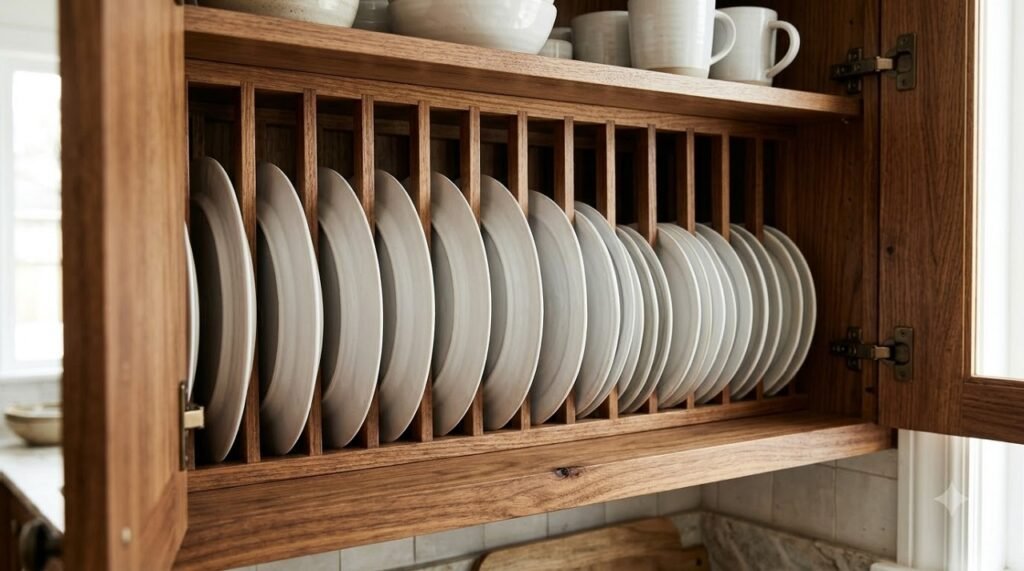
What it is: A rack that stores plates vertically, like records in a crate.
Minimum space: 12 inches of cabinet depth.
Why it works: Makes plates easier to grab and lets you see what you have. Also allows you to store more plates per shelf.
Cost: $20–$50
Pro tip: Use it in a drawer or cabinet rather than on the counter. It preserves the space-saving benefit.
Idea 10: Slim Pull-Out Cart (4–6 Inch Width)
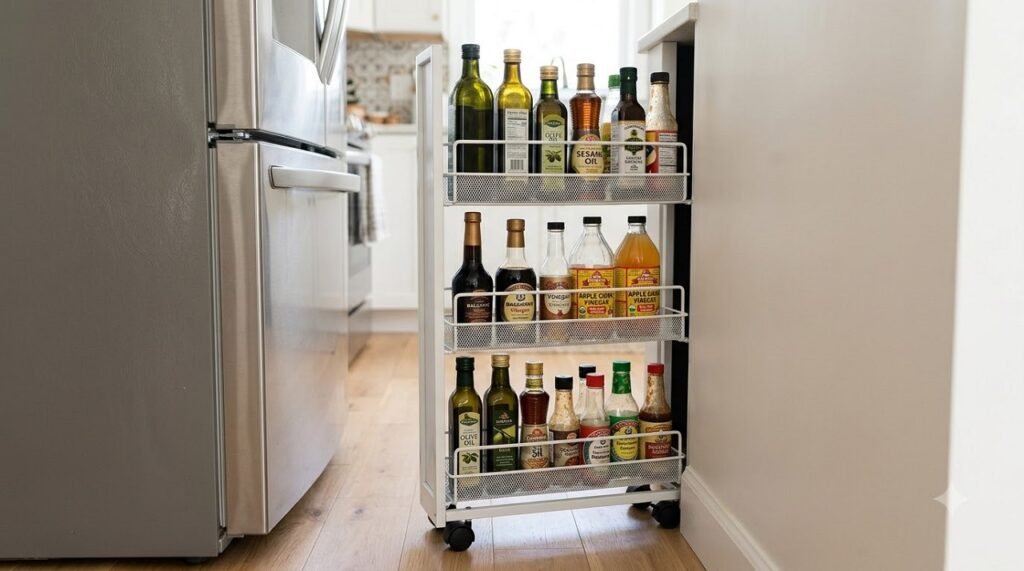
What it is: A very narrow rolling cart that slides into the gap between the fridge and the wall or between cabinets.
Minimum space: 4–6 inches of floor width.
Why it works: Fills what would otherwise be a dead gap. Holds oils, condiments, and tall bottles.
Cost: $60–$200
Pro tip: Measure your gap precisely—most carts are 4.7 or 5.9 inches wide. Anything wider won’t fit.
Ceiling & Above-Cabinet Storage (Ideas 11–13)
Idea 11: Above-Cabinet Baskets
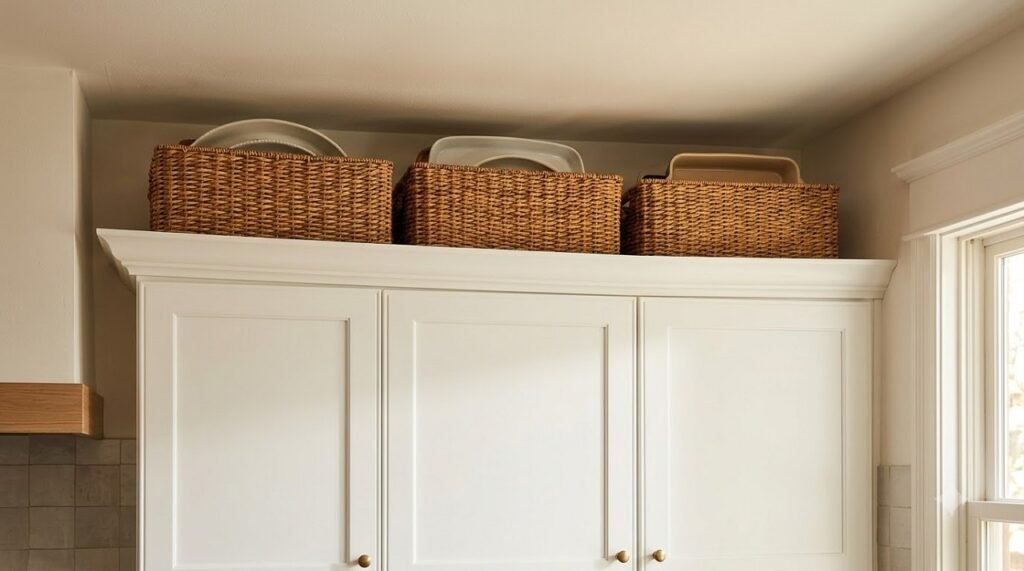
What it is: Woven or metal baskets placed on top of upper cabinets for rarely used items. Houzz has a strong gallery of above-cabinet storage ideas if you want more styling inspiration.
Minimum space: 12–24 inches between cabinet top and ceiling.
Why it works: Turns dead space into storage for serving dishes, holiday platters, and items used a few times a year.
Cost: $10–$40 per basket
Pro tip: Use matching baskets so the space looks styled, not cluttered. Avoid this zone if the gap is under 12 inches—it becomes hard to reach.
Idea 12: Ceiling-Mounted Pot Rack
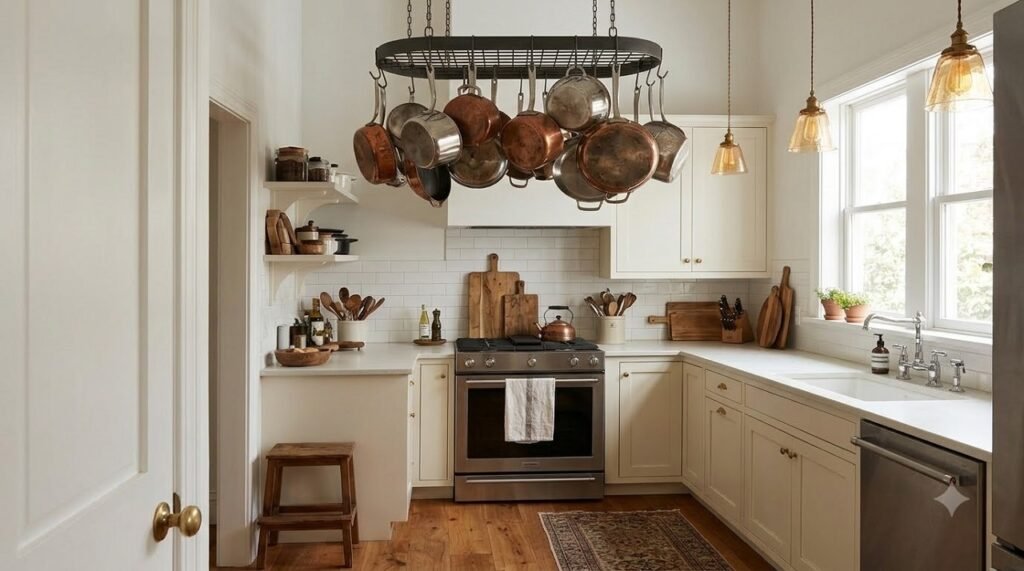
What it is: A rack hung from the ceiling for pots, pans, and utensils.
Minimum space: 36×24 inches of ceiling, plus 36 inches of clearance below.
Why it works: Eliminates an entire cabinet’s worth of pot and pan storage. Adds an industrial, professional feel.
Cost: $60–$300
Pro tip: Only install if your ceilings are at least 8 feet high. Below that, a hanging rack becomes a head hazard.
Idea 13: Over-the-Fridge Shelf
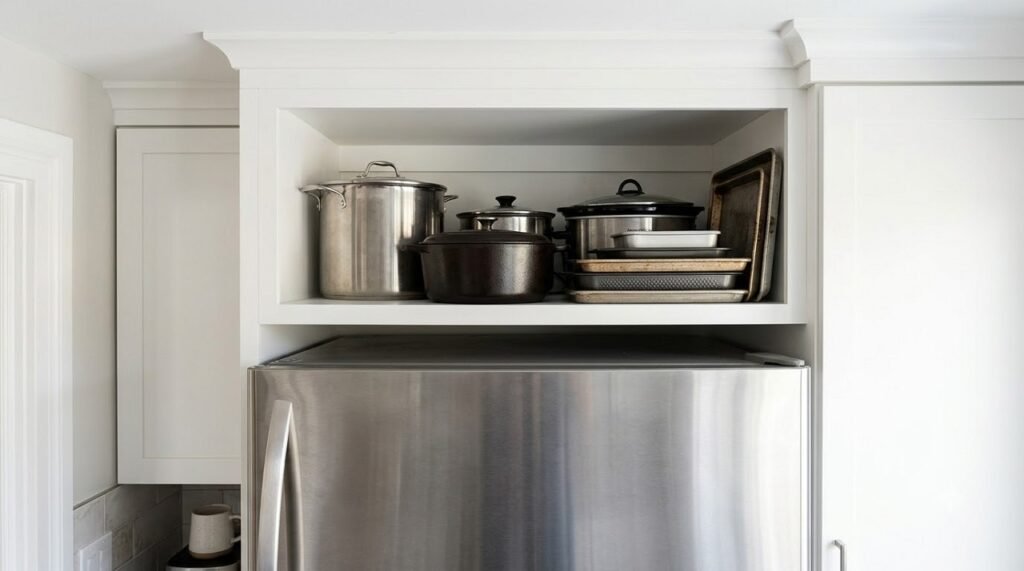
What it is: A shelf or cabinet installed directly above the refrigerator.
Minimum space: 30–36 inches of width, 12–18 inches of height.
Why it works: The space above a fridge is almost always wasted. A simple shelf turns it into storage for trays, large pots, or the slow cooker.
Cost: $30–$200
Pro tip: Use it for infrequently used items, since reaching above the fridge usually requires a step stool. For more storage solutions in narrow kitchens, see our 10 galley kitchen layout guide.
📐 Working With a Narrow Kitchen?
Our guide to the 10 best galley kitchen layouts covers storage configurations for narrow spaces, with real measurements for every option.
View 10 Galley Kitchen Layouts →Door & Inside-Cabinet Hacks (Ideas 14–17)
Idea 14: Over-the-Door Organizer
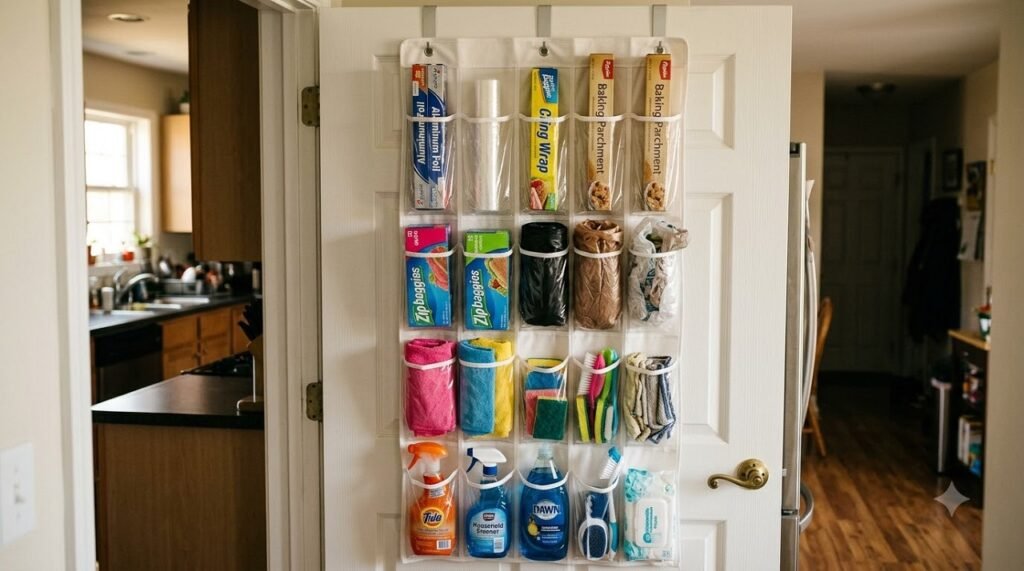
What it is: A rack that hangs over the top of a kitchen door, providing shelving or pocket storage.
Minimum space: Standard door width (30–36 inches).
Why it works: Uses otherwise dead space on the back of a door. Ideal for cleaning supplies, wraps, and foil.
Cost: $20–$60
Pro tip: Use a pocket-style organizer for wraps, foil, and plastic bags. Use a shelf-style for spices and small jars.
Idea 15: Inside-Cabinet Door Rack
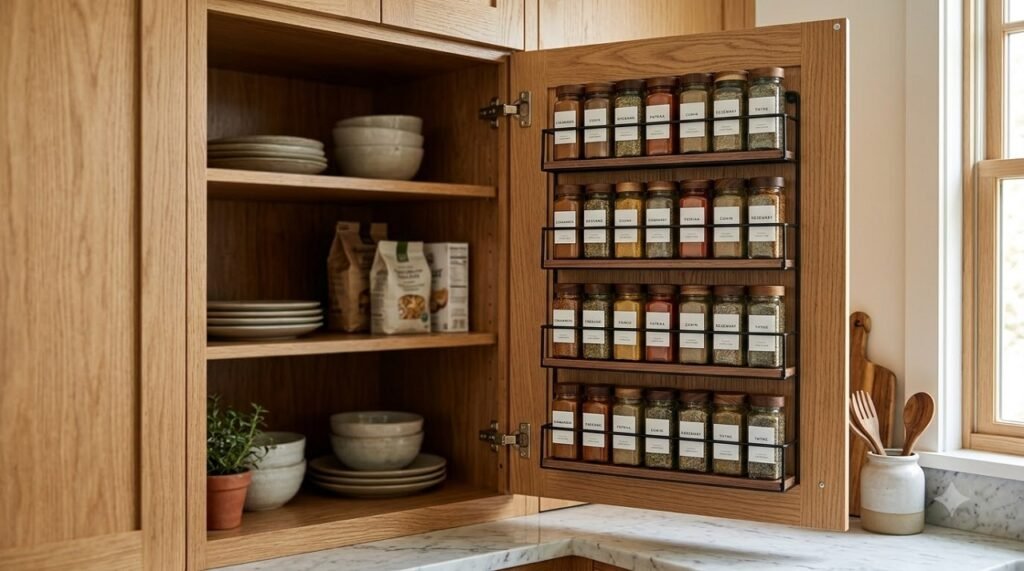
What it is: A slim rack mounted on the inside of a cabinet door for spices, lids, or cutting boards.
Minimum space: Cabinet door interior, 12–18 inches wide.
Why it works: Nearly doubles the usable storage of a shallow cabinet. Uses the depth of the door panel.
Cost: $15–$40
Pro tip: Install one on the door of your spice cabinet to instantly free an entire shelf.
Idea 16: Under-Shelf Basket
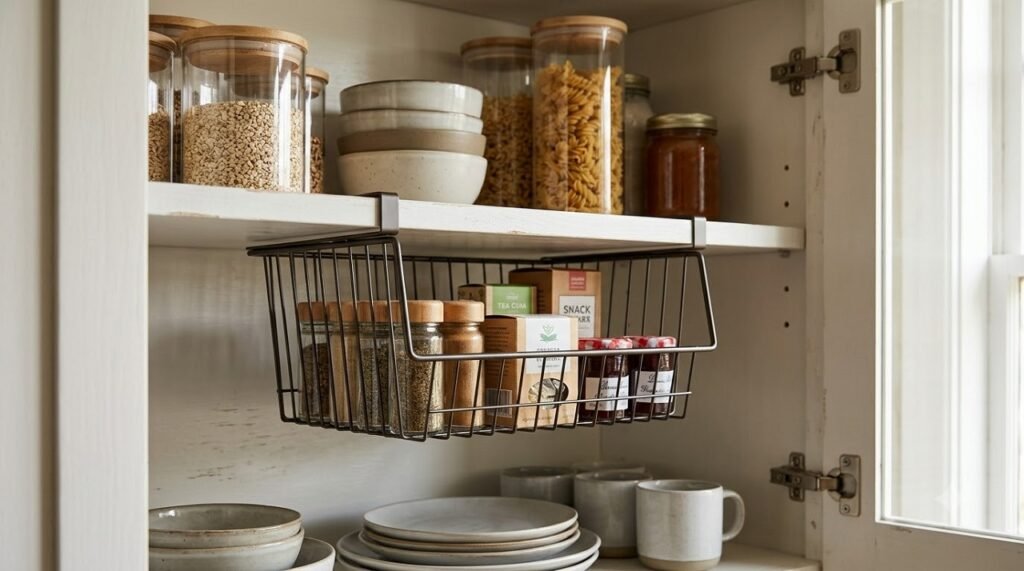
What it is: A wire basket that hangs beneath an existing shelf, creating a second tier of storage.
Minimum space: 10–12 inches of shelf width.
Why it works: Turns one shelf into two. Perfect for storing small items below larger ones.
Cost: $10–$25 each
Pro tip: Use them in cabinets with tall gaps where the top half is wasted.
Idea 17: Tension Rod Dividers
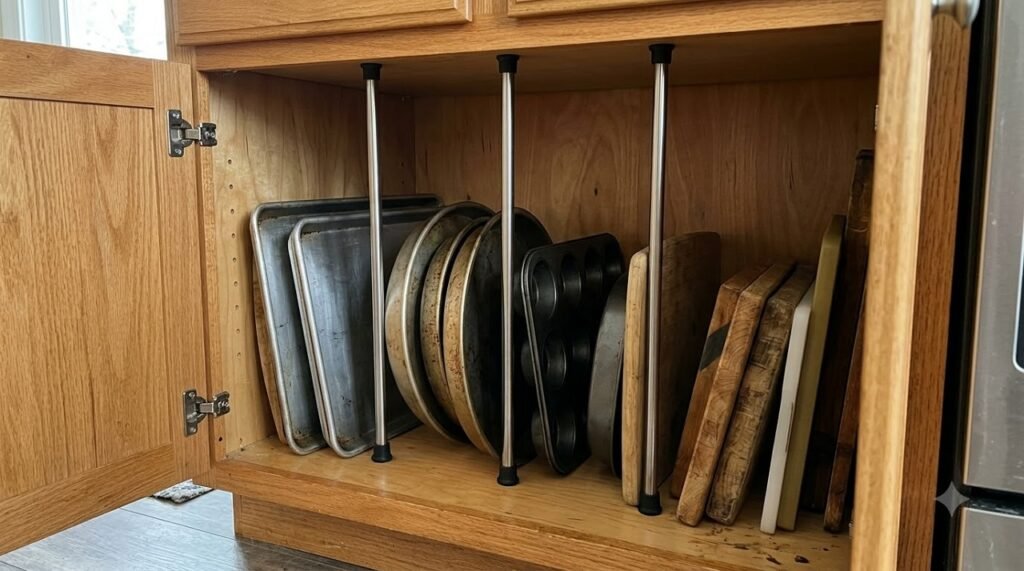
What it is: A tension rod placed vertically inside a cabinet to create a divider for baking sheets or cutting boards.
Minimum space: Cabinet interior height.
Why it works: Costs under $5 and instantly organizes flat items that would otherwise fall over.
Cost: $3–$10
Pro tip: Use rubber-tipped tension rods so they don’t slip or scratch cabinet interiors.
Under-Cabinet & Over-Sink Solutions (Ideas 18–20)
Idea 18: Under-Cabinet Appliance Shelf
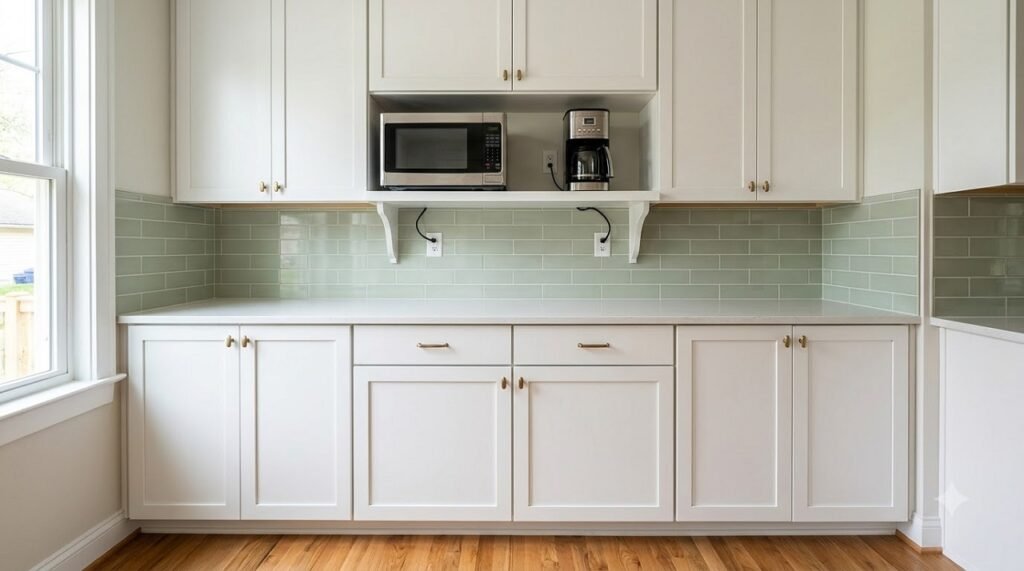
What it is: A shelf or rack mounted underneath your upper cabinets to store small appliances like the microwave or coffee maker.
Minimum space: 18 inches of horizontal width, 12 inches of height.
Why it works: Frees an enormous amount of counter space by lifting appliances up.
Cost: $30–$150
Pro tip: Confirm your upper cabinets are securely anchored before mounting anything heavy underneath. This is a job for professional installation if you’re unsure.
Idea 19: Over-the-Sink Cutting Board or Drying Rack
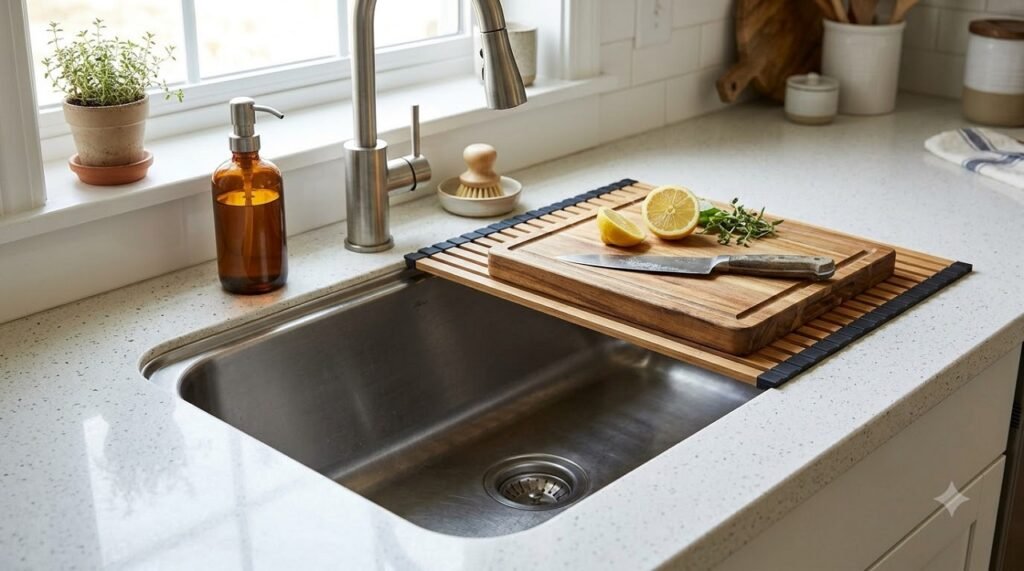
What it is: A board or rack that sits across the sink, using the sink’s footprint as storage.
Minimum space: Sink width.
Why it works: Adds prep or drying space without using any counter at all.
Cost: $25–$80
Pro tip: Choose a roll-up or folding version so you can move it out of the way when you need the sink.
Idea 20: Under-Sink Pull-Out Organizer
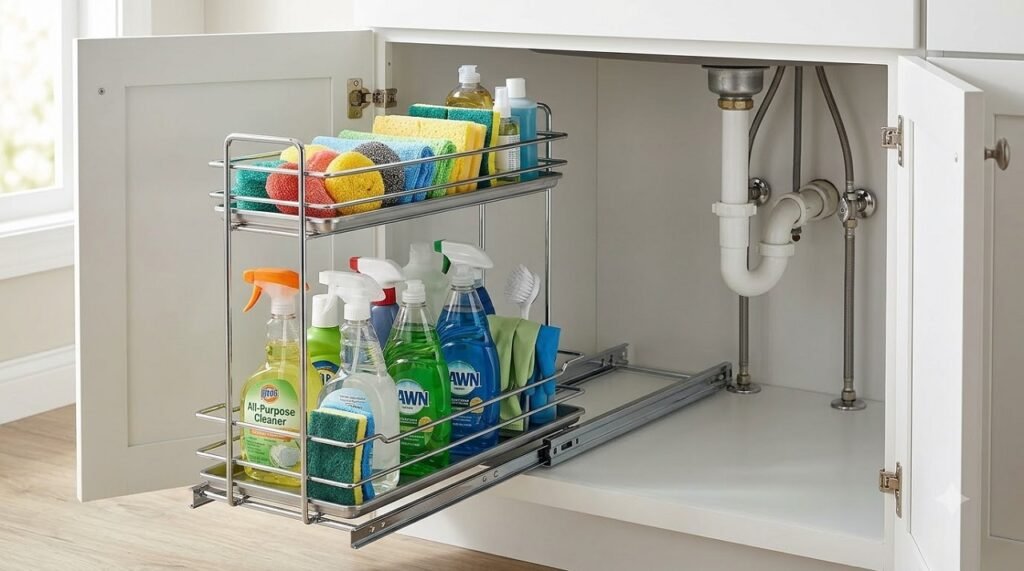
What it is: A two-tier pull-out unit that slides out from under the sink, working around the plumbing.
Minimum space: Under-sink cabinet width.
Why it works: Under-sink cabinets are notoriously inefficient. A pull-out unit works around the drainpipe and doubles the usable space.
Cost: $40–$120
Pro tip: Measure around your garbage disposal and drainpipe before buying. Most organizers have cutouts, but sizing still matters.
Side-by-Side Comparison: Which Ideas Cost the Least, Work the Best?
| Idea | Cost Range | Space Freed | Difficulty |
|---|---|---|---|
| Magnetic knife strip | $15–$60 | 4×6″ counter | Easy |
| Wall rail with hooks | $20–$80 | Moderate | Easy |
| Floating shelves | $25–$100 | Large (display) | Moderate |
| Magnetic spice rack | $15–$40 | Small shelf | Easy |
| Pegboard wall panel | $30–$120 | Large | Moderate |
| Floor-to-ceiling cabinet | $400–$1,500 | Very large | Pro install |
| Pull-out pantry (12″) | $150–$600 | Large | Moderate |
| Baking sheet divider | $15–$50 | One shelf | Easy |
| Vertical plate rack | $20–$50 | One shelf | Easy |
| Slim pull-out cart | $60–$200 | Small gap | Easy |
| Above-cabinet baskets | $10–$40 | Dead space | Easy |
| Ceiling pot rack | $60–$300 | Large | Pro install |
| Over-fridge shelf | $30–$200 | Dead space | Moderate |
| Over-door organizer | $20–$60 | Door back | Easy |
| Inside-door rack | $15–$40 | One shelf | Easy |
| Under-shelf basket | $10–$25 | Half shelf | Easy |
| Tension rod divider | $3–$10 | One cabinet | Easy |
| Under-cabinet appliance shelf | $30–$150 | Large counter | Pro install |
| Over-sink board | $25–$80 | Sink area | Easy |
| Under-sink pull-out | $40–$120 | Under-sink | Moderate |
Highest impact for lowest cost: Magnetic knife strip, inside-cabinet door rack, tension rod divider, above-cabinet baskets.
6 Common Vertical Storage Mistakes to Avoid
- Going too deep on shelves. Anything over 10–12 inches deep blocks sightlines and makes the kitchen feel heavier.
- Mounting heavy items on weak walls. Always anchor into studs, not just drywall.
- Ignoring the 18-inch clearance rule above counters. Anything lower than 18 inches over a prep counter becomes an obstacle.
- Overloading the backsplash. Too many rails, hooks, and strips turn a wall into visual noise. Pick one or two systems, not five.
- Buying before measuring. Measure your gaps, shelf heights, and door widths first. Return shipping is expensive.
- Skipping matching containers. Mismatched jars and bottles defeat the purpose. Uniformity makes vertical storage look intentional, not cluttered.
Frequently Asked Questions
What is the best vertical storage for a small kitchen?
For most small kitchens, the highest-impact vertical storage is a combination of a magnetic knife strip, an inside-cabinet door rack, and floating shelves. These three add significant storage without reducing floor space or blocking light.
How do I store items above my kitchen cabinets?
Use matching baskets for items used a few times a year—serving dishes, holiday platters, large pots. Avoid storing anything you need weekly, since reaching above cabinets usually requires a step stool. Anything you use often should live below eye level.
Do magnetic knife strips damage knives?
No, provided you use a strong magnet with a smooth surface. The magnetic field holds the blade without contact damage. Avoid cheap strips with weak magnets, which can cause knives to fall.
Is it safe to mount a pot rack on the ceiling?
Yes, if the rack is anchored into ceiling joists and your ceiling is at least 8 feet high. Professional installation is strongly recommended for heavy racks, since failure can be dangerous.
How can I add vertical storage without drilling?
Use tension rods, over-the-door organizers, freestanding slim carts, and adhesive-mounted hooks. These are rental-friendly and remove without damage. For a more permanent solution with no drilling, use a freestanding tall cabinet or rolling cart.
What is the minimum gap needed above upper cabinets for baskets?
At least 12 inches of clearance between the top of the cabinet and the ceiling. Below 12 inches, the gap becomes hard to reach and baskets won’t fit cleanly.
Conclusion
You don’t need a bigger kitchen to have more counter space. You need to look up.
Every idea in this list—from a $5 tension rod to a $600 pull-out pantry—works on the same principle: move storage off the floor and onto the walls, doors, and ceiling. Do that, and your counters finally become what they were meant to be: a place to cook.
Start with the three highest-impact, lowest-cost fixes:
- A magnetic knife strip to clear the knife block.
- An inside-cabinet door rack to double your spice storage.
- Floating shelves above the counter to replace one upper cabinet.
Then add more as you find gaps that need filling. Within a weekend, you’ll have visibly more counter space and a kitchen that feels twice as functional.